The air conditioning cooler is a very important part of the of the AC unit. If the coil is damaged or just stops working, you will soon find that your AC unit will fail to work. In order to fix this problem, you will have to remove the old coil and replace it with a new one. Coils can be received through contacting the manufacturer. You could also get it through your AC supplier. An easy alternative is to get a professional air conditioning repair serviceman, but with the following tips you can do-it-yourself.
First, you’ll need a screwdriver (Philips or “+” head depending on AC Unit), a wrench, and a new coil.
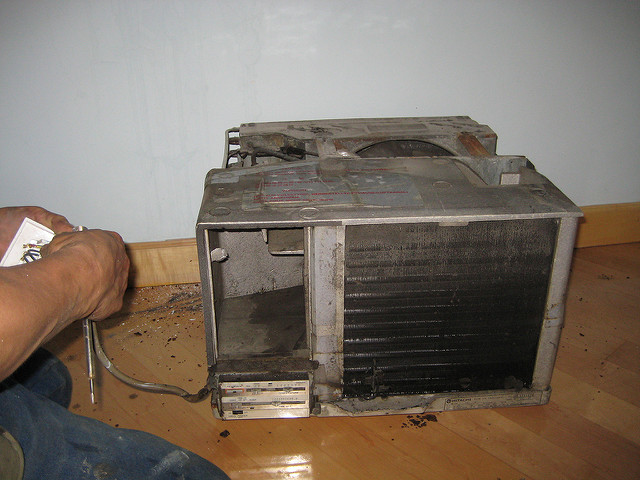
Step 1: Removing the Faulty Coil
Before beginning to dismantle the AC unit, be sure it is off, unplugged and inactive. Remove the AC unit from the wall by unscrewing the Unit and lay it down on newspapers or some form of tarp. Next is to take off the cover of the AC unit and then unscrew the nuts from the side. Depending on the model, you may also need to unscrew the cover. Once the cover is off, you should be able to see the faulty coil and be able to detach it from the rest of the unit. Depending on what model you have, again, you may have to unscrew further or remove tubes and pipes with the wrench.
Step 2: Fitting the New Coil
Once you have removed the faulty coil, take the new coil out of the plastic package and compare the two pieces to see how the new coil should fit into the unit. Removing any dust or debris from the AC unit is recommended in order to allow any of the particles from damaging the new coil. Place the new coil where the old coil was, and reattach any tubes or pipes you may have removed. If you don’t feel the pipes/tubes are connecting well enough, you may use some pipe sealing tape, which should strengthen the connection. Next is to leave the coil in its position overnight to allow the new coil to settle in its place.
Step 3: Finishing The Job
After you have finished screwing the coil into place, you replace the cover and set the unit upright. Put the AC unit back in your wall and screw it in tightly, then plug it in and turn it on. Leave on for an hour, then return to check the status of the coil and whether there is any water damage or dents in the unit. These can be signs that the coil wasn’t screwed in tightly enough or the connections are not at a secure level where the unit can operate at full capacity. Tighten all the screws and repeat this process until the AC unit functions properly.